Area Dashboard Strategy
Fully configurabe Dashboard with View per Area and auto-populating entities ordered in Grids.

The dashboard was designed to be fully responsive! You can absolutely use this also on tablets or phones!
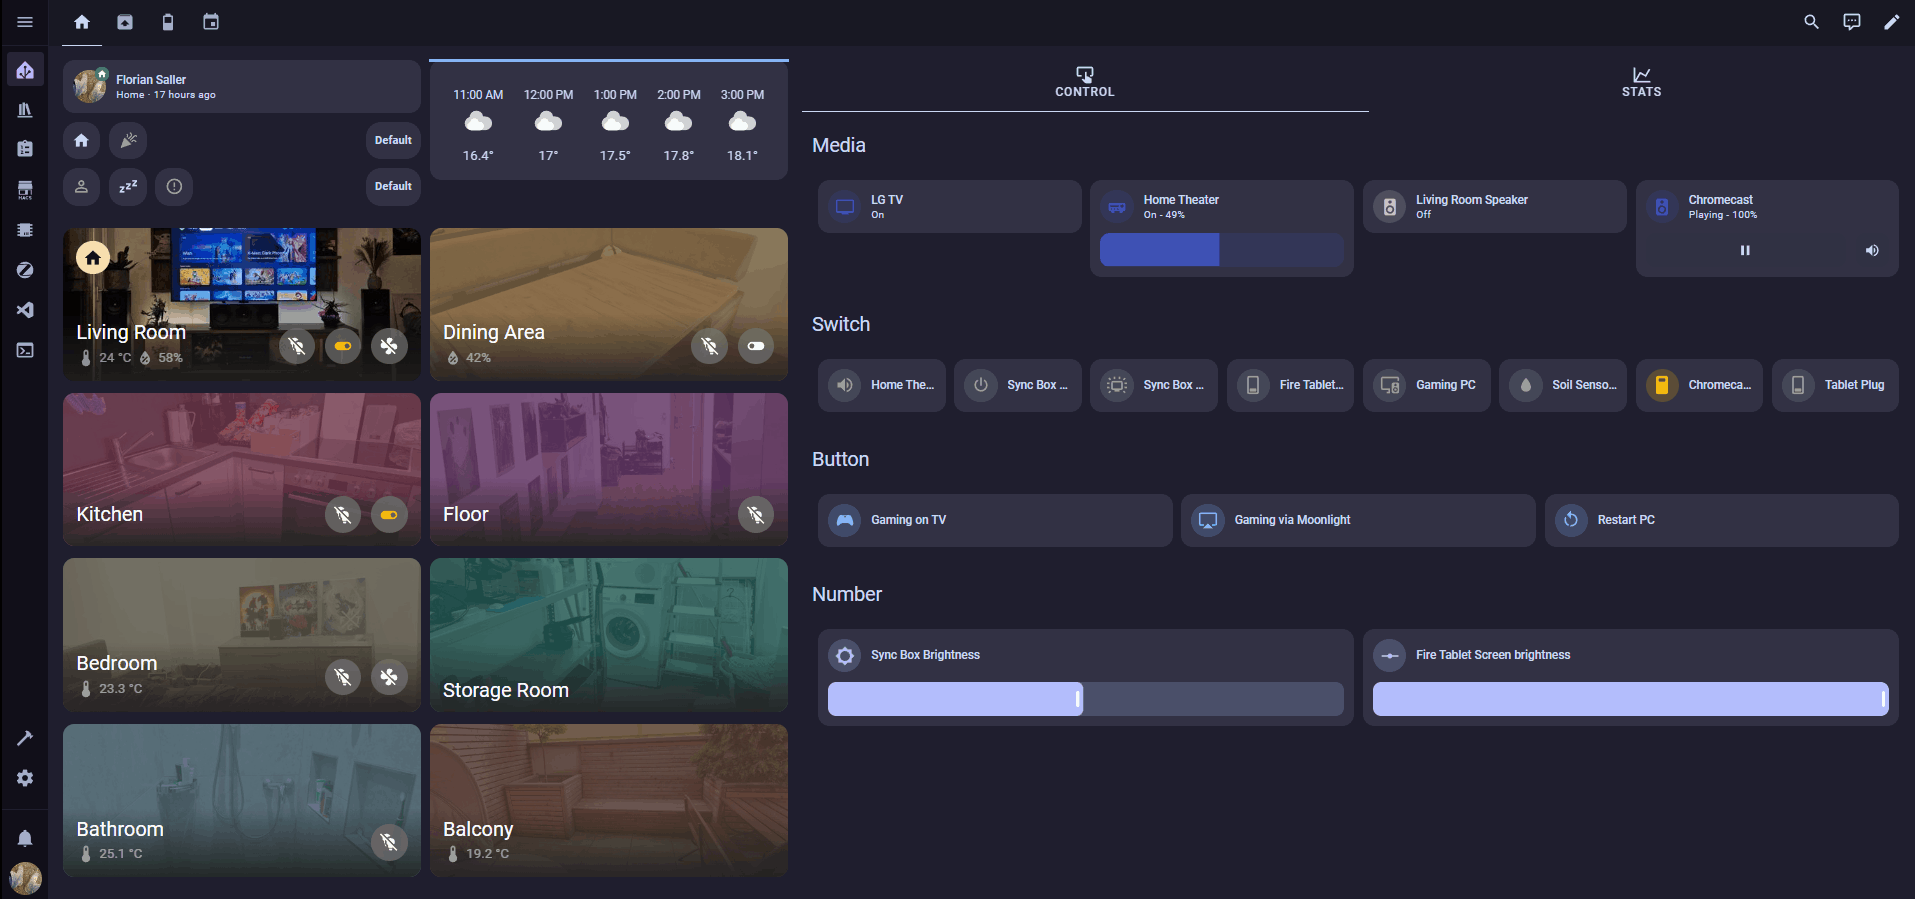
The Dashboard contains all entities assigned to the Area selected in the Navigation (either via device or entity itself).
This Dashboard Strategy generates multiple Views. One per Area configured in your Home Assistant instance.
You may not be able to tell it generates multiple Views because all but one are made invisible in the top menu.
This is because the navigation is meant to be made with the left-sided navigation menu.

Usage
You need to create a new empty Dashboard for this Strategy Dashboard.
Dashboard -> Edit Dashboard -> Kebap Menu -> Raw Configuration Editor -> Paste the following
strategy:
  type: custom:area-dashboard-strategy
  config: #Your Config here
This Strategy has a sensible base configuration, which is the one i myself use!
You can start without configuring anything. If you want to change something take a look at the Configuration Documentation.
UI explained
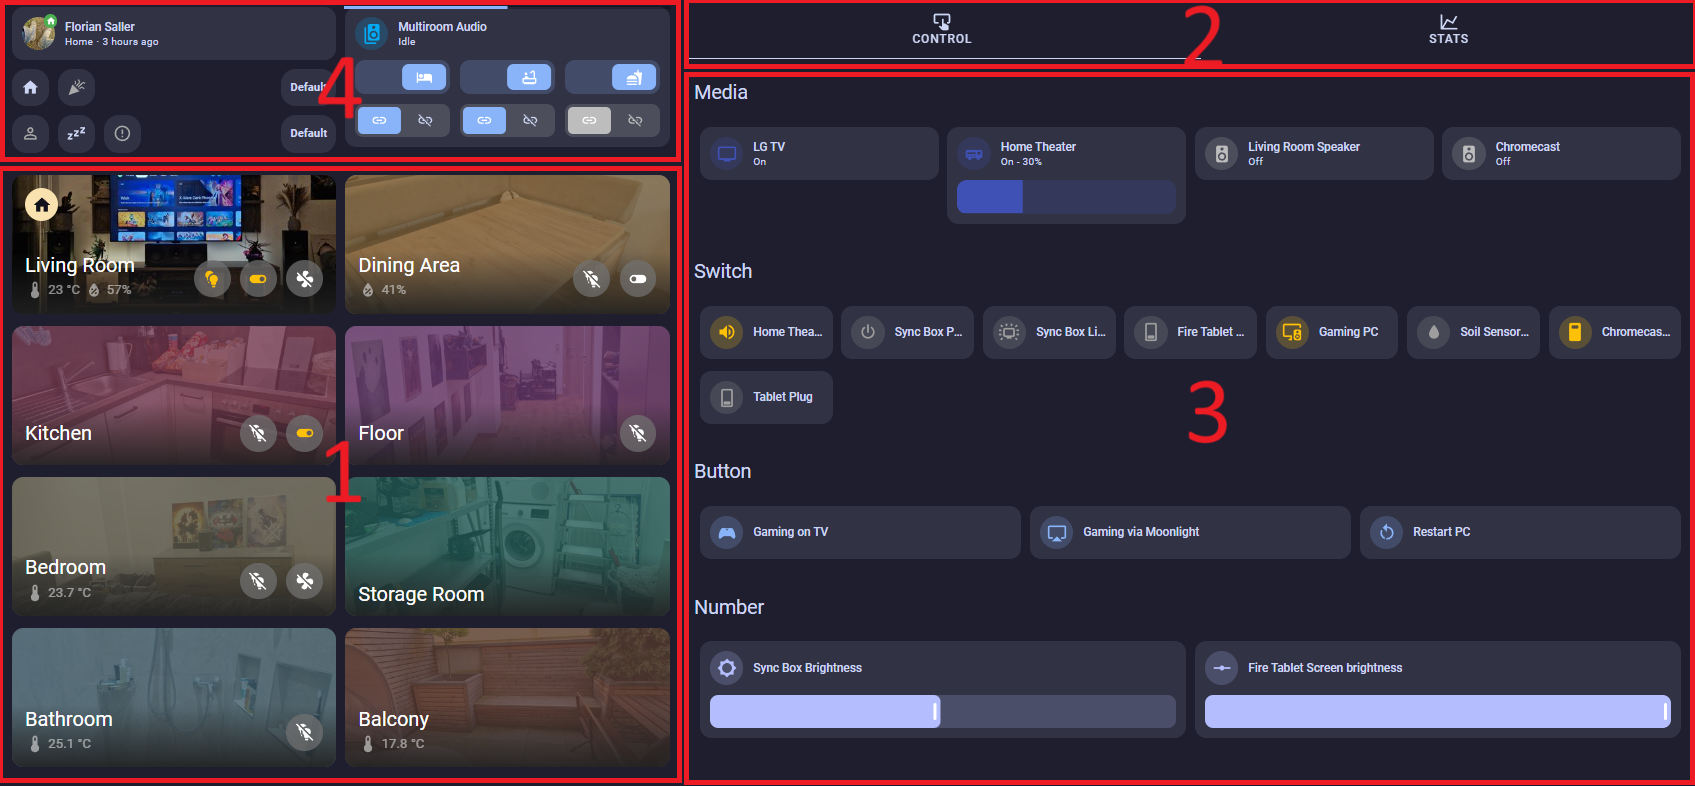
1. Navigation
The Area Cards are forming a navigation menu. You can navigate the Views with a Click on the Area Card on the left Side.
If you want the area card to show a background image you need to upload an image to your area.
2. Main
The Entities/Cards are grouped in different tabs.
They should be used to add another logical layer to dashboard apart from the grids and make the dashboard less cluttered.
3. Grids
A Tab can contains as many grids of entities as you like. The grids are supposed to represent different domains and their entities.
For example one grid for media_players and another grid for switches.
4. Top
The area above the navigation is completly configurable with a slot (of sorts) with the key topCards.
That means nothing is displayed there in the base configuration as this is very individual.